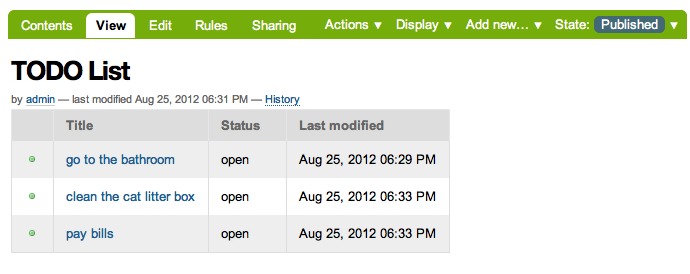
Chapter 3: Custom View
In this chapter you will learn how to add a custom view -- in our case a listing of Todo Items.
View class
Let's start by adding the view class. You can go to
tutorial.todoapp repo on GitHub
and copy over code from
src/tutorial/todoapp/todo.py
to your local computer or just use git:
$ git branch --track chapter3 origin/chapter3  # tell git what chapter 3 is
$ git checkout chapter3 src/tutorial/todoapp/todo.py
We also need to tell Plone to display this view in the
display drop-down menu for Folders so we will
later be able to set our view as a default display view
for our Todo folder. Let's do that by using git to get a
version of
Folder.xml
and put it in
src/tutorial/todoapp/profiles/default/types.
$ git checkout chapter3 src/tutorial/todoapp/profiles/default/types/Folder.xml
View template
Now that we have a class we can also add the template. Go
to
tutorial.todoapp repo on GitHub
and copy over code from
src/tutorial/todoapp/templates/todo.pt
to your local computer or, again, use git.
$ git checkout chapter3 src/tutorial/todoapp/templates/todo.pt
The template uses the ZPT syntax, read more about it here.
Static resources
The template displays different icons for different workflow states of your Todo Items. We need to add these icons to your package:
-
Download
open.pngandcompleted.pngfrom GitHub (they are insrc/tutorial/todoapp/static) into a new folder on your local computer:src/tutorial/todoapp/static. You can use git again if you don't like manual work.$ git checkout chapter3 src/tutorial/todoapp/static -
Tell Zope that this
staticfolder contains static resources (icons, CCS files, JavaScript files, etc.) by adding the following lines tosrc/tutorial/todoapp/configure.zcmlinside the<configuretag:<!-- Publish static files --> <browser:resourceDirectory name="tutorial.todoapp" directory="static" />
After restarting your Zope server, files in your
static
folder will be available on a standard URL:
http://localhost:8080/Plone/++resource++tutorial.todoapp/<filename>
Try it out
Because the XML configuration of our product has change,
we need to reinstall the product. This is accomplished by
deactivating
and
reactivating
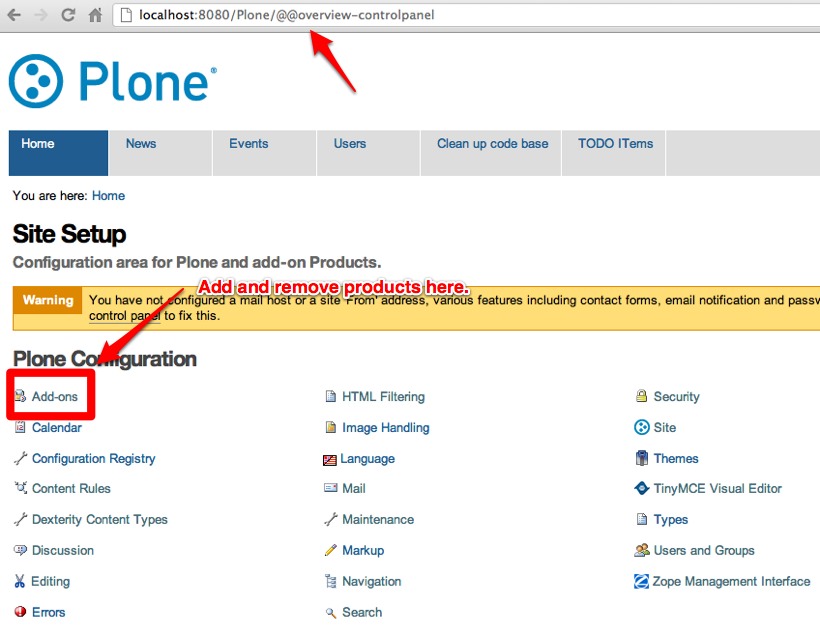
the product. Navigate to the add-ons manager or go
directly to
http://localhost:8080/Plone/@@overview-controlpanel.
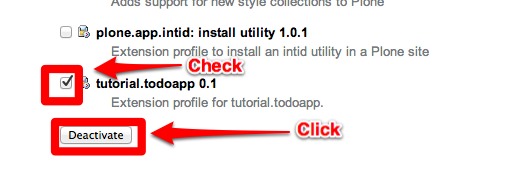
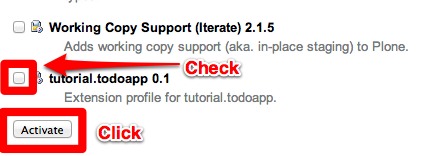
Deactivate the tutorial.todoapp product, and then reactivate it.
Note that every time you make a change to the xml files, by exporting or manual edit, you must reactivate the product for the changes to take effect!
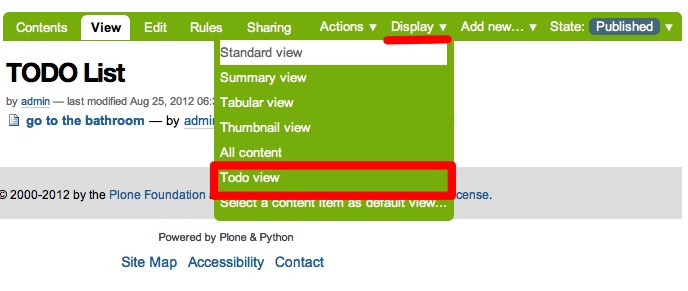
Now, we apply the new view to the folder holding our todo items. Navigate to the folder you created in chapter 1, and update the display.
Celebrate!
If the de-activate / activate does not work you may need to restart Plone instance to see the changes.
Tests
Cool, so you have verified that your code works through the browser and it's time to add tests to make sure your code keeps on working in the future.
First add the following snippet to
test_setup.py
to verify that your Folders have the
todo
view on the Display drop-down menu.
# types/Folder.xml
def test_folder_available_layouts(self):
    """Test that our custom display layout (@@todo) is available on folder.

    Also make sure that layouts that come with Plone out-of-the-box are
    also still there.
    """
    layouts = self.portal.folder.getAvailableLayouts()
    layout_ids = [id for id, title in layouts]

    # out-of-the-box layouts are still there
    self.assertIn('folder_listing', layout_ids)
    self.assertIn('folder_summary_view', layout_ids)
    self.assertIn('folder_tabular_view', layout_ids)
    self.assertIn('atct_album_view', layout_ids)
    self.assertIn('folder_full_view', layout_ids)

    # our custom one
    self.assertIn('todo', layout_ids)
If you haven't already downloaded it, add a new test
module:
test_todo_view.py. Download it from GitHub, put and it in your
tests
folder and run tests. Feel free to fiddle around with it
to see what it does. As always, you can use git to get the
file.
$ git checkout chapter3 src/tutorial/todoapp/tests/test_todo_view.py
Troubleshooting
If something goes wrong you can always go to GitHub and see how the code for chapter 3 should look like and compare this to what you have on your local machine.

